

What is Tie and Dye?
Tie and dye is a method of dyeing by hand in which coloured patterns are produced in the fabric by tying them tightly with string or rubber bands before immersing the cloth in the dyebath. The dye fails to penetrate the tied sections and hence beautiful patterns form. The process of tie-dye typically consists of folding, twisting, pleating, or crumpling fabric or a garment and binding them in different ways for various types of design outcomes, followed by application of dye(s).
What kind of cloth material to use?
Tie and dye garments have lately become one of the biggest trend of the fashion industry. Tie Dye goes best on natural fibres like cotton, silk, jeans, linen etc. For beginners, cotton would be the best choice as it provides excellent results and different variations give you unique designs and color patterns. Further, they are easy to handle as well. You may dye anything starting from your handkerchiefs to your shirts, shorts, jeans etc.
What kind of dyes to use?
Kids may use Tie and Dye kit which are easily available in the market for crafting purposes. They are also available online. Food colours can also be used. Tie and dye can also be achieved with fabric or acrylic paints in lieu of dyes which will be discussed later.
String or rubber bands to tie?
Younger kids will find it easier to use rubber bands to tie the cloth with not much difference in the final outcome. Strings (thick threads) can also be used though.
Simple Process of Tying and Dyeing for Kids – Step by Step
There are various ways to tie and dye your fabric but below we will be showing the process which is kid friendly and hence boiling water, hot and cold techniques etc will not be used. Also, kids will have fun doing the activity and delighted with the final result.
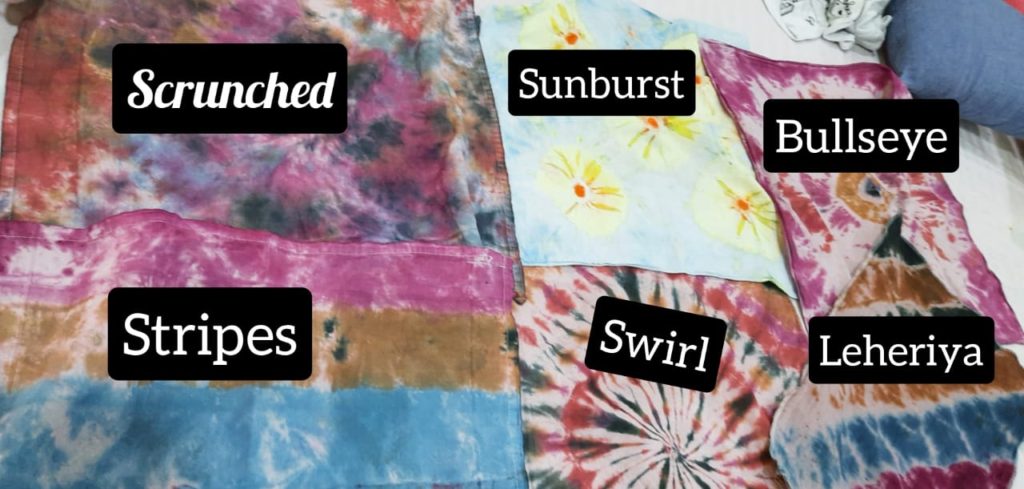
Techniques used below are Swirl, bullseye, scrunches, stripes and leheriya.
So, lets get started!
Things needed:
- Fabric Dye ( You may use Kadam Dyes which are easily available online )
- Plastic liner for table (to safeguard the work area)
- Fabric or any garment (preferably white)
- Gloves and apron
- Salt/ vinegar/ dye fix (for preserving dyed colours)
- Squeezy bottles or paint brushes & water bowls (one bowl for each colour you will be using)
- Rubber bands
- Others like fork, marbles, cylindrical container etc as per the technique used.
- Rough cloth to wipe hands, clean table
- plastic bag/ polythene
Preparation
- Set your table by putting the plastic sheet on it so that colours donot penetrate on to the table.
- Ready your dyes as per the instructions in the tie/ dye kit or you can mix the dye powder/ liquid with normal to warm temperature water. Donot forget to wear your gloves. Quantity of dye to be mixed with water will depend on the colour shade you want. For darker shades, more dye will be needed and vice versa. Each colour will be separately mixed in different bowls. If you have squeezy bottle, you may use them for mixing and dying and they are less messy and easy to work.
- Diluted dyes should be used within 1 hour as otherwise they start losing their strength.
Tying Process
Step 1: Dampen the cloth you want to dye with normal water and squeeze as much water you can. Place the fabric on the plastic sheet. You may use thick layer of newspaper as shown in the below picture if plastic sheet is not available. This needs to be done whatever technique you decide to go for.
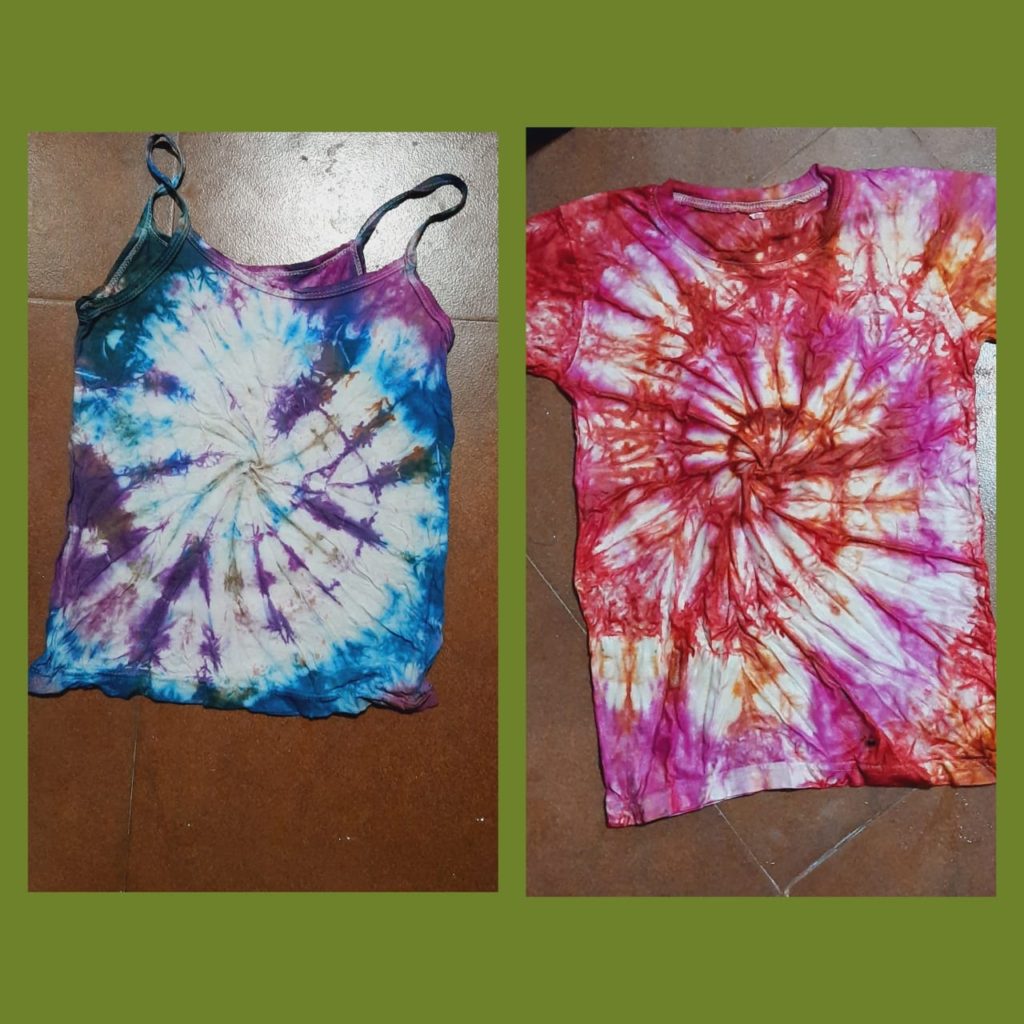
Swirl Technique
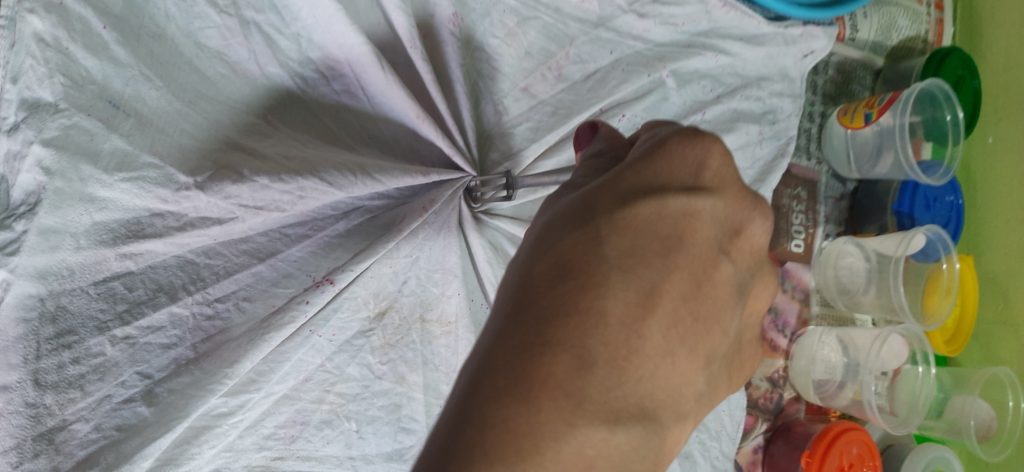
Fold the fabric into half and then again half to mark the midpoint. This will be the starting point of the swirl.

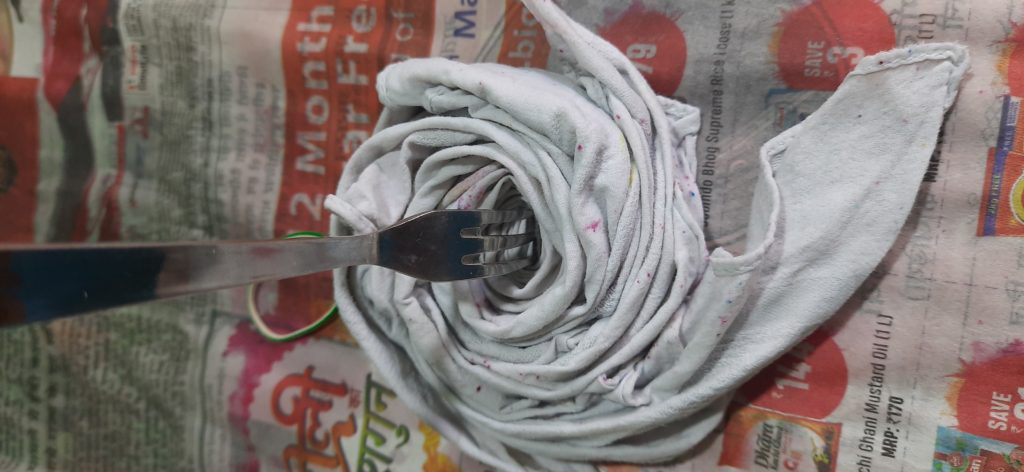
Open up the fabric again and start twisting the fabric from the middle point marked earlier as shown below. If you do not want the swirls to begin from the middle point of your cloth, you can start twisting from the point where you want the swirls to start with. You may rotate using a fork or can be done with fingers pinching the centre.
Bring together the open ends and a circle kind of shape will be formed.
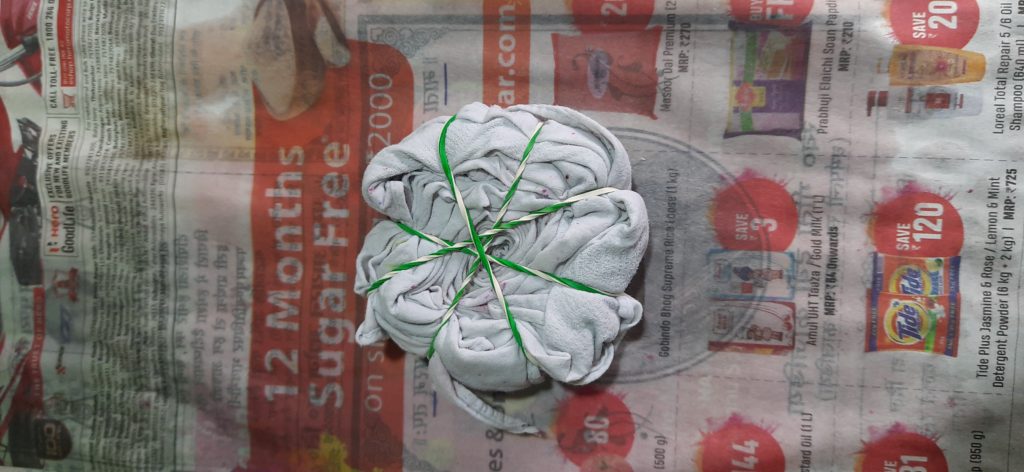
Tie the disc so formed with rubber bands. At least three rubber bands will be needed or you can use more. Tie them in such way that no loose ends keep hanging. The fabric is ready to be dyed. See image below.
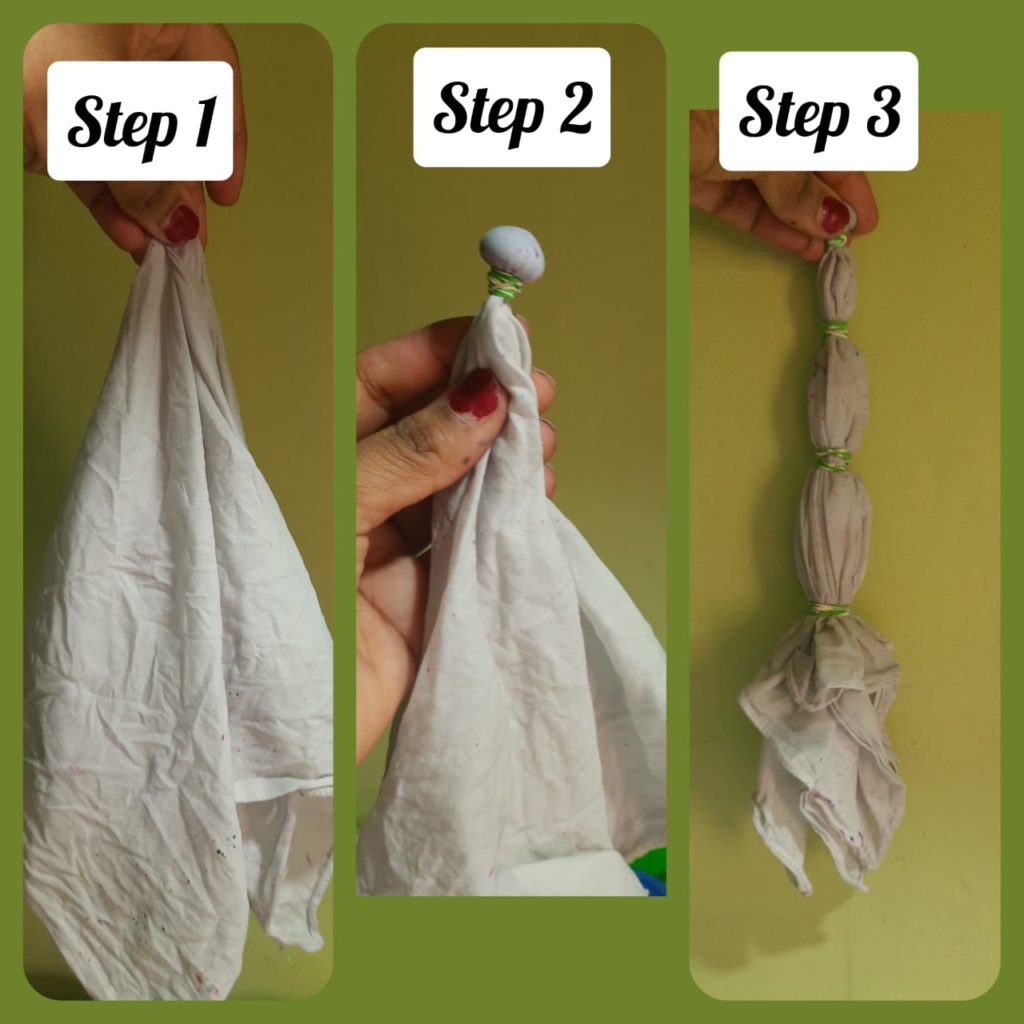
Bullseye Technique
Step 1: Find the centre point of the fabric.
Step 2: Place a marble/ bead/ gramseed inside and tie with the rubber band tightly.
Step 3: Tie rubber bands on the fabric as shown in the image. Tied areas will not get dyed creating a pattern.
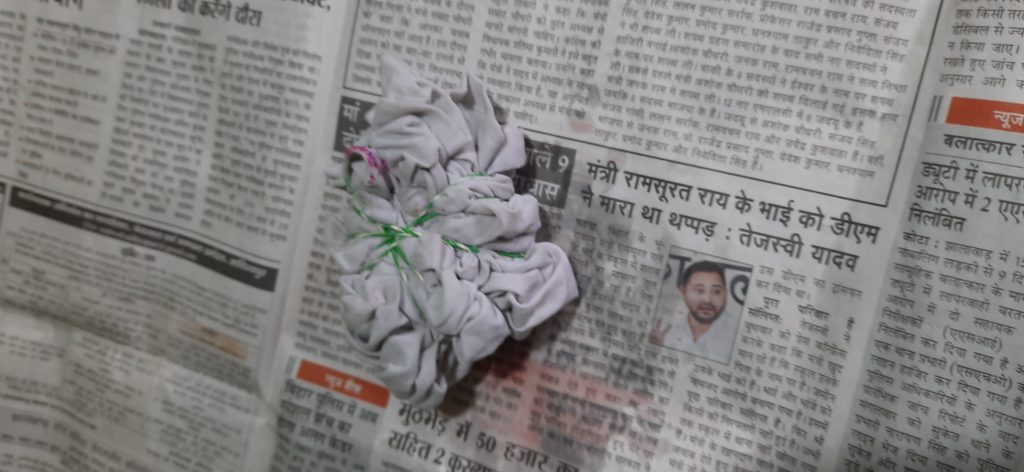
Scrunched Technique :
In this technique, randomly crumble the fabric and tie with rubber bands.
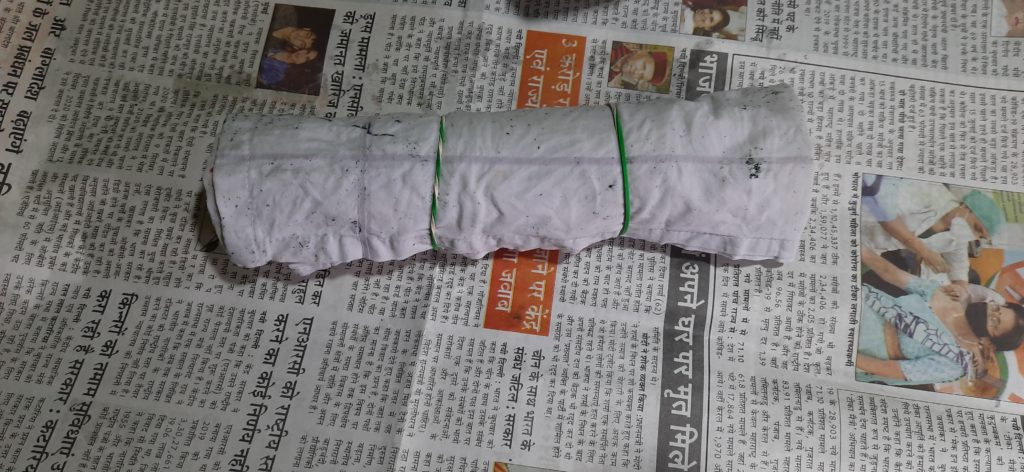
Stripes Technique
Roll the fabric on a rod and tie rubber bands with distances you would want the stripes to be from one another. Even a pencil can be used for rolling.
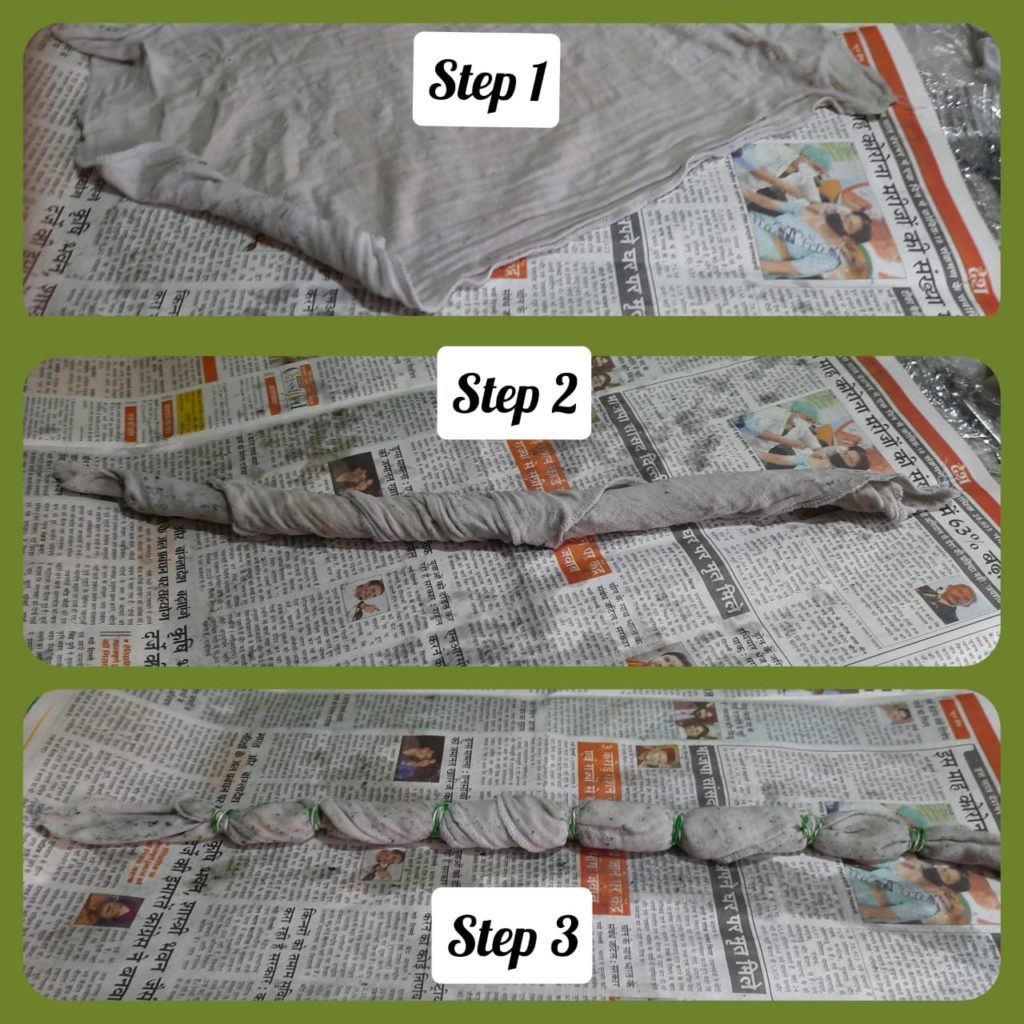
Leheriya Technique
Start rolling the fabric from one corner as shown below and then tie them leaving spaces. The tied areas will remain white.
Dyeing Process
After tying, now your fabric is ready to be dyed.
Be sure to wear your gloves and apron. Dye can be just as damaging as bleach to your unprotected skin. Please take the proper safety precautions recommended.
Take your diluted dye colours in the squeezy bottle and start pouring on the fabric using your choice of colour combination or you may use just one colour. The tied areas remain white creating a beautiful pattern.
Dyes can also be diluted in different bowls or containers if you do not have the squeezy bottles. Use thick paint brush to colour instead of pouring then.
Use lots and lots of colours such that they completely penetrate into the folded areas .
Do the same pattern on the opposite side as well. Remember to wipe dry the work area before dyeing the other side.
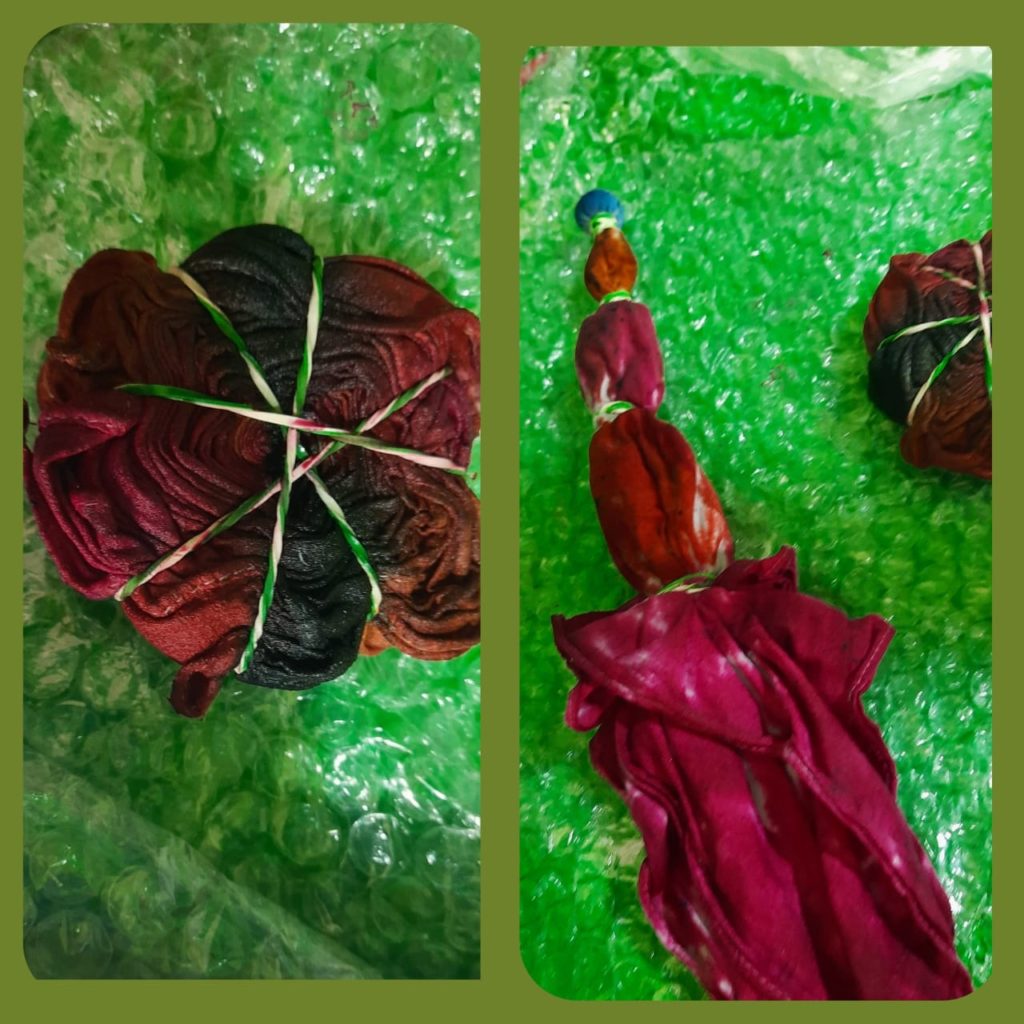
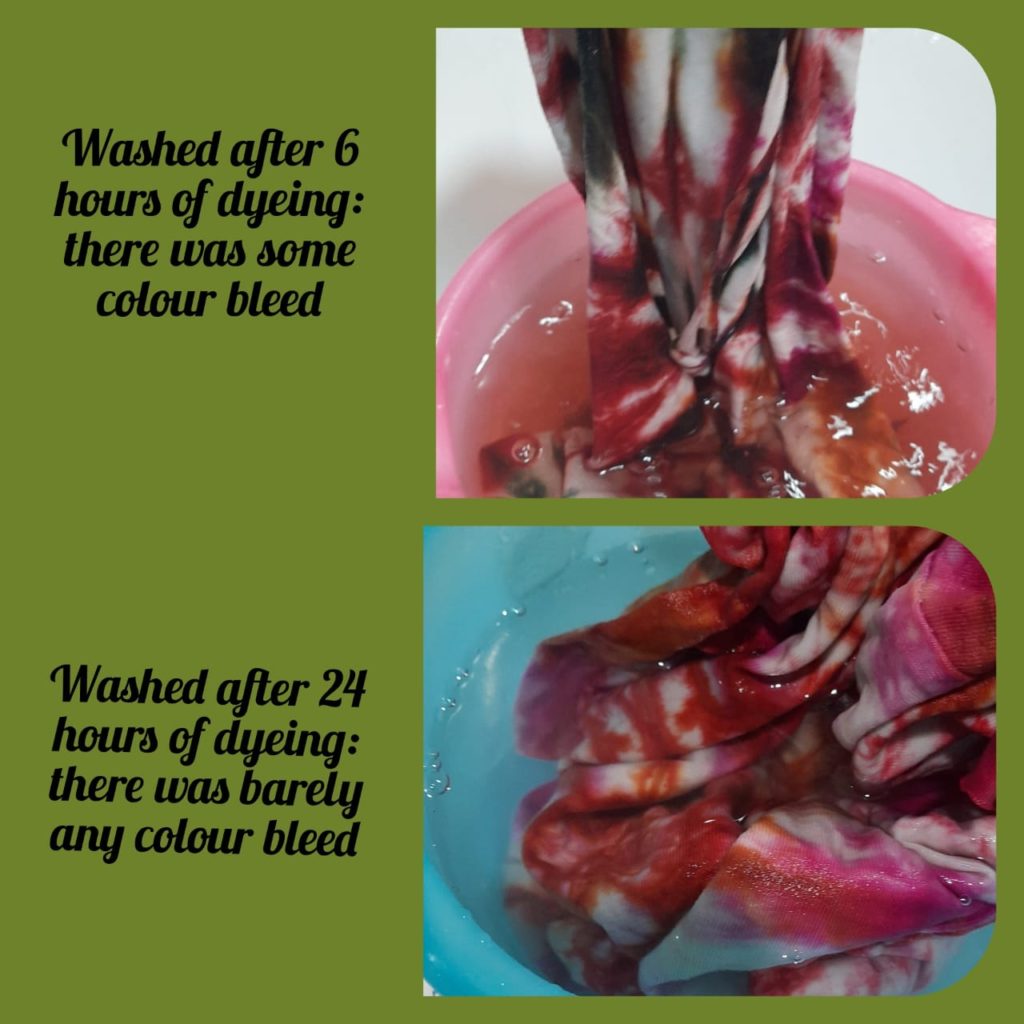
Now , place the dyed cloth in a sealable plastic bag or just wrap it in a polythene. Let it sit for at least 6 to 48 hours. The longer you allow the dyes to penetrate in to the cloth, the vibrant the colours will be.
Washing Your Fabric
After taking out your fabric from the plastic , remove the rubber bands carefully.
Rinse the dyed cloth in tap water unless all the extra dye comes out. When the water comes out clean, this step is complete.
Next, wash your cloth with a very less amount of mild detergent.
Finally, take cold water and add some salt to it and give your fabric the final rinse. Dye fix liquid available in market can also be used.
Dry your cloth. Do not dry in direct sunlight as colours may fade.
The results are splendid!
Note:
- We are not using hot and cold technique as this craft is for kids. The final product anyways will be awesome.
- Future washes will be in cold water only and separately.
Happy Dyeing!

